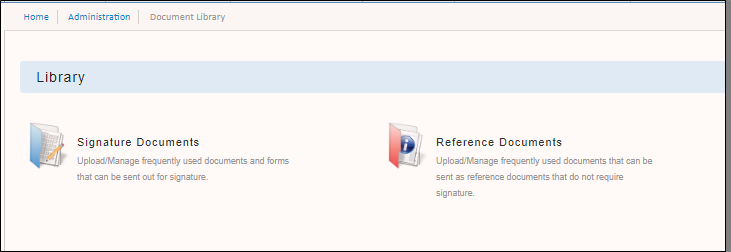
You can add frequently used signature documents to your Document Library to quickly and easily include signature documents in your file. It's a best practice to include all authorization documents in the Document Library.
You must be a Sertifi Admin+ to add signature documents to the Document Library.
Adding authorization documents
To add a authorization document to your Document Library:
- Login to your Sertifi portal.
- Navigate to Administration > Document Library.

- Click Signature Documents. The Signature Documents screen opens.
- Click Upload to add a signature document from your machine. A popup window opens.
- Enter a title for the document.
- Click Choose File to navigate to the document on your machine, and then select it.
- Click Upload. You can now include the signature document in files you send to your clients.
When you upload a signature document to the Document Library, the document is private by default, which means that only you can view it.
Document options
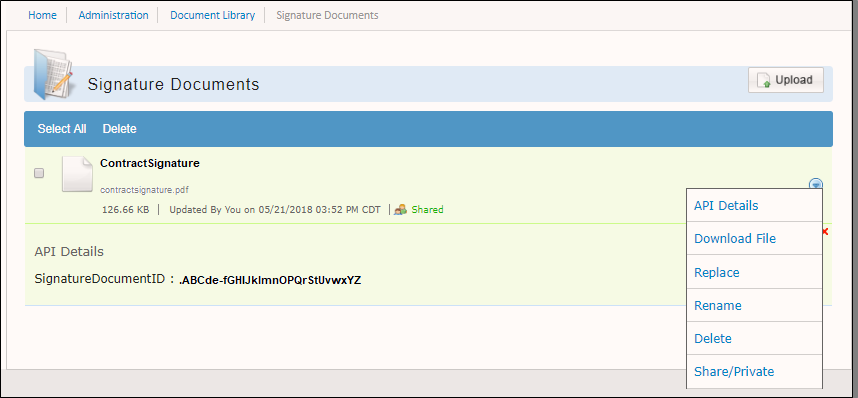
You can view and change the authorization document after you upload it by selecting the blue arrow. You have the following options:

- API Details - click API details to view the ReferenceDocumentID.
- Download File - click Download File to download the authorization document to your machine.
- Replace - click Replace to replace the authorization document with a new one.
- Rename - click Rename to rename the authorization document.
- Delete - click Delete to remove the authorization document from the library.
- Share/Private - click Share/Private to change the default setting to share, so that other users can include the signature document in their file, or keep the setting to private, so that only you can add the authorization document.
